Category Archives: Misc - Page 11

Create random terrain in Blender 2.49

  1. Start Blender and remove the default cube (select it and press key: x)
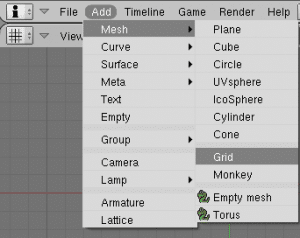
  2. Add a grid to the scene: Add->Mesh->Grid.
    Create grid

    Create grid

    32×32 segments works good for smaller grids

    Segments

    Set segments

  3. Select the Shading panel (F5) and go into Material edit mode (the round sphere icon)
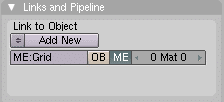
  4. Click on “Add New”under the Link to Object
    Link To Object

    Link To Object

    This opens up a new pane

  5. Switch to the Edit Texture mode (F6)
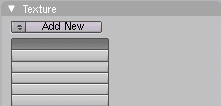
  6. In the Texture pane click the “Add New” button

    Add New Texture

    Add New Texture

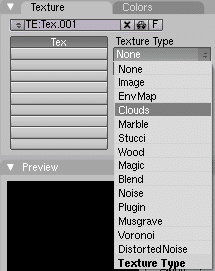
  7. Select Clouds as the texture type

    Clouds

    Select "Clouds"

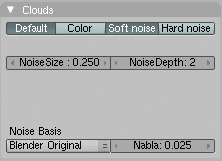
  8. Now you can adjust the Clouds settings if you want. I will stay with defaults here

    Cloud settings

    Cloud settings

  9. Now switch back to Material Edit mode (the red sphere icon)
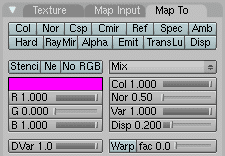
  10. Close to the Texture pane there is now a Map to pane – open it

    Map To options

    Map To options

  11. All buttons in the Map to pane should be off
  12. Now switch to the Edit pane (F9) and enter Edit mode (TAB). All vertices in your grid should now be selected
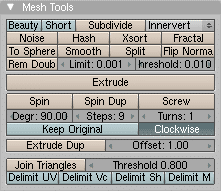
  13. In the Mesh Tools pane click the Noise button
    Mesh Tools

    Mesh Tools

    (if you want more height just keep clicking the Noise button)

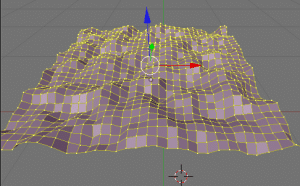
  14. Now you are done

    Random terrain

    Random terrain result

Tested in Blender 2.49

Setup ioquake3 mod workspace in XCode 3.2

Since I am new to all this mod stuff I thought I better write down how I did. I am using Xcode 3.2.4 and r2202 of the ioquake3 source code. For compiling I use the ioquake make-macosx.sh script. Lets get started:

  1. Checkout source code:
    svn://svn.icculus.org/quake3/trunk ioquake
  2. Build the code:
    ./make-macosx.sh
  3. Run ioquake to see that everything is working:
    ./build/release-darwin-x86_64/ioquake3.x86_64
  4. Now I create a copy of the build/release-darwin-x86_64 folder in the build folder. I name it release-macosx. It is in here that we will test our mod (the release-darwin-x86_64 folder is always deleted before compiling so all our .pk3 files will be deleted when we build and that is why I make a copy)
  5. Take the pak0.pk3 file from the Quake III Arena CD and put it in build/release-macosx/baseq3/
  6. Download the latest point release (1.32b) .pak3 files for baseq3 and missionpack and add them to build/release-macosx/. These can be found here: http://www.quakeiii.nl/files/ (and other places)
  7. Create a folder in release-osx to hold our mod e.g
    mkdir build/release-osx/MyMod
  8. Now we will make a small script that will copy the game files from the compilation folder (where make-macosx.sh puts them) and to our mod folder:
     
    #!/bin/sh
    
    #Filename: copy.sh
    
    cp build/release-darwin-x86_64/baseq3/cgamex86_64.dylib build/release-osx/MyMod/
    cp build/release-darwin-x86_64/baseq3/qagamex86_64.dylib build/release-osx/MyMod/
    cp build/release-darwin-x86_64/baseq3/uix86_64.dylib build/release-osx/MyMod/
    
  9. If you want to make your own maps also create a maps folder:
    mkdir build/release-osx/MyMod/maps

    This is the place where the q3 engine will look for .bsp maps

  10. Now it is time to fire up XCode – start with creating a new project with template: “Mac OX S/Other/External Build System”
  11. Now right click on your project (in the left tree view) and choose “Add/Existing Files…”
  12. Navigate to the “code” folder (ioquake/code), select all folders and click “Add”. We have now added all the source code – time to create a build target
  13. Right click “Targets” (left tree view) and choose “Add/New Target”. Select “Mac OS X/Other/Shell script target”. Give the target a name and click “Finish”
  14. Right click “Run script” (targets/targetname/Run script in left tree view). Choose “Get info”. In the General tab under “Script” add:
    ./make-macosx.sh
    ./copy.sh 
    
  15. Now to run the game I made a small script called run.sh:
    #!/bin/sh
    build/release-osx/ioquake3.x86_64 +set sv_pure 0 +set vm_cgame 0 +set vm_game 0 +set vm_ui 0 +set fs_game MyMod +map q3dm1
    

    This will run our mod MyMod with the map q3dm1

  16. Now you are done! Start modding and when you want to compile just hit “Build” from the “Build” menu (output from the script will automatically turn up in XCodes “Build results” window). To run the game just type ./run.sh in the terminal

Using the xmlns:xml namespace when validating with xsd

The xml namespace is the default namespace but sometimes you need to define it when working with xsd. The secret here is that the xml namespace only accepts one particular uri (“http://www.w3.org/XML/1998/namespace”). Here is an example of an xsd validation using the xml namespace:
XML to validate

<?xml version="1.0"?>
<books  xmlns="http://www.my.com"
		xmlns:xsi="http://www.w3.org/2001/XMLSchema-instance"

		xsi:schemaLocation="http://www.w3.org/XML/1998/namespace xml.xsd
        http://www.my.com my.xsd"

		xmlns:xml="http://www.w3.org/XML/1998/namespace">
    
    <book xml:author="Astrid Lindgren"/>
</books>

To validate the xml:author xml we use the schema definition below (xml.xsd):

<?xml version="1.0"?>
<xs:schema xmlns:xs="http://www.w3.org/2001/XMLSchema"
            targetNamespace="http://www.w3.org/XML/1998/namespace" 
            elementFormDefault="qualified">
                
       <xs:attribute name="author" type="xs:string"/>

</xs:schema>

Notice the “targetNamespace”